

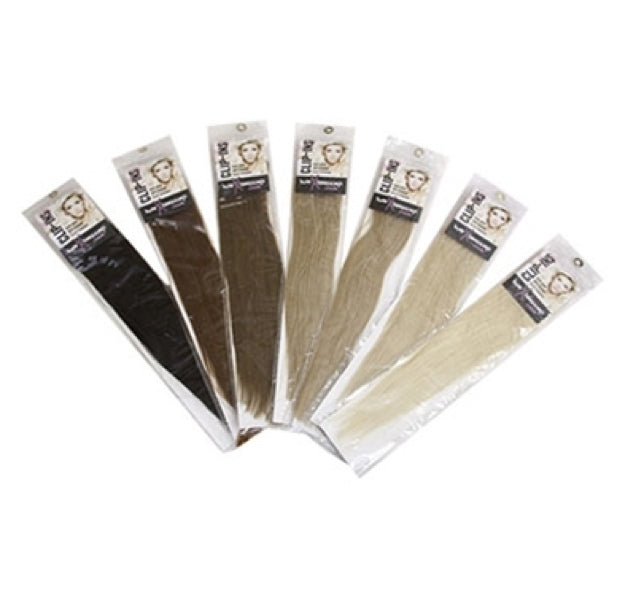
Tape-In hair extensions are a professionally fitted extension method that uses flat adhesive panels to secure extension hair around carefully sectioned natural hair.
A traditional Tape-In fitting normally uses two adhesive panels positioned together with an appropriate section of natural hair between them. This is commonly referred to as a tape sandwich.
The flat attachment can create a discreet finish, but correct preparation, section size, placement and panel alignment are important for a secure and comfortable fitting.
This guide focuses specifically on Tape-In application. For removal, adhesive clean-up and preparing suitable extensions for reuse, visit our separate Tape-In Hair Extension Removal Guide .
Quick answer: Tape-In extensions are professionally fitted by preparing clean, dry natural hair, creating controlled sections and positioning compatible adhesive extension panels around an appropriate amount of natural hair. The panels should align cleanly and sit securely without excessive tension or contact with the scalp.
Professional Tape-In Fitting Recommended
Tape-In extensions do not require heat fusion, but that does not make correct application automatic. Natural-hair condition, section size, adhesive cleanliness, attachment position and weight distribution all need to be considered before and during fitting.
What Are Tape-In Hair Extensions?
Tape-Ins use flat adhesive extension panels rather than individual keratin bonds or rings.
In a standard sandwich application, a controlled section of natural hair sits between two compatible extension panels. The adhesive areas meet around the natural hair to form a flat attachment.
Flat Attachment
Tape panels sit relatively flat within the natural hair and can create a discreet finish when correctly positioned.
No Heat Fusion
Tape-In application relies on adhesive panels rather than a heated keratin-fusion tool.
Panel-Based Method
Extension weight is distributed across a wider attachment than an individual strand method.
Reusable When Suitable
Suitable extension panels may be professionally cleaned, retaped and reused if the extension hair remains in good condition.
Start With a Professional Consultation
Before applying Tape-Ins, assess the client's natural hair and plan the fitting according to density, condition, colour, desired result and attachment coverage.
Natural Hair Density
Check whether the hair can comfortably support the planned number and placement of Tape-In panels.
Hair Condition
Significantly weak, damaged or thinning areas require careful assessment before fitting.
Colour Match
Select the closest shade or shade combination before application.
Placement Plan
Consider natural movement, coverage and visibility before deciding where panels should be positioned.
Do not use a homemade universal adhesive-on-skin test as a substitute for an appropriate consultation. Follow relevant product or manufacturer instructions where testing is required.
Preparing the Natural Hair Before Tape-In Fitting
Adhesive attachment areas need properly prepared natural hair. Oils, conditioners and styling residue around the roots can interfere with the fitting.
- Detangle the natural hair thoroughly.
- Make sure the root and fitting areas are clean and completely dry.
- Avoid oils, serums and rich conditioning treatments around the roots.
- Do not apply styling products to the planned attachment areas.
- Work with neat, controlled sections.
- Keep surrounding hair clipped securely away.
- Keep adhesive surfaces clean and avoid unnecessary finger contact.
Tape adhesion depends on more than simply washing the hair. Clean adhesive surfaces, correct section size, alignment and professional application are also important.
How Much Natural Hair Should Go Between Tape-In Panels?
The natural-hair section should be appropriate for the width and weight of the Tape-In attachment.
Too Much Hair
Excess natural hair between the panels can prevent the adhesive surfaces from connecting as intended.
Too Little Hair
An undersized section may place unsuitable extension weight on too few natural hairs.
Do not simply keep removing natural hairs until two panels stick. If an attachment is not bonding correctly, check preparation, section size, adhesive condition and panel alignment before continuing.
Where Should Tape-In Extensions Be Positioned?
Attachments should be positioned so they remain covered by the surrounding natural hair while allowing comfortable movement.
Avoid placing panels so close to the scalp that they cannot move naturally, or so close to exposed hairlines and partings that the attachments become visible.
There is no single fixed distance or number of rows that suits every client. Placement depends on natural-hair density, head shape, growth direction, desired result and the areas being fitted.
Tools Needed for Tape-In Fitting
How to Fit Tape-In Hair Extensions
Follow this professional application sequence for a standard Tape-In sandwich fitting.
Create the First Fitting Row
Section the natural hair cleanly and clip surrounding hair away from the attachment area.
Isolate the Natural-Hair Section
Select an appropriate section to support the extension panels without overloading or overfilling the adhesive area.
Prepare the First Tape Panel
Remove the protective backing without unnecessarily touching or contaminating the adhesive surface.
Position the Lower Panel
Place the first extension panel beneath the controlled natural-hair section in the intended fitting position.
Check the Natural-Hair Section
Confirm that the section is evenly distributed across the attachment and that neighbouring hairs have not been caught accidentally.
Position the Upper Panel
Align the second Tape-In panel with the lower attachment so the two panels meet correctly around the natural hair.
Secure the Attachment
Use suitable Tape-In application pliers to apply controlled, even pressure across the attachment according to the product and professional fitting method being used.
Check Alignment & Comfort
Confirm that the panels are aligned, flat and secure without pulling tightly against the scalp.
Continue Through the Fitting
Repeat systematically while maintaining suitable spacing, coverage, weight distribution and attachment consistency.
What Should a Correctly Fitted Tape-In Attachment Look & Feel Like?
Flat & Aligned
The upper and lower panels should line up neatly rather than sitting unevenly across one another.
Secure
The attachment should remain closed without immediately separating or sliding.
Comfortable
The client should have natural movement without significant or persistent pulling.
Discreet
Panels should be positioned where sufficient natural hair can cover the attachment.
Why Do Tape-In Hair Extensions Slip?
Tape-In slippage or panel separation can have several contributing factors.
- Oil, conditioner or styling-product residue near the attachment
- Adhesive contamination during application
- Too much natural hair between the adhesive panels
- Incorrect panel alignment
- Insufficient or uneven application pressure
- Unsuitable or worn replacement adhesive
- Aftercare products applied directly around the tapes
- Attachment growth and overdue professional maintenance
If several Tape-In panels repeatedly slip, investigate the cause rather than simply pressing or retaping the same attachments without checking preparation and fitting.
Common Tape-In Fitting Mistakes
Do
- Assess natural-hair condition first
- Prepare the fitting area thoroughly
- Keep adhesive surfaces clean
- Use controlled natural-hair sections
- Align upper and lower panels accurately
- Allow comfortable natural movement
- Use professional application tools appropriately
- Check every attachment after fitting
Avoid
- Applying tape over oily or heavily conditioned roots
- Touching adhesive surfaces unnecessarily
- Overfilling the sandwich with natural hair
- Using tiny sections to support too much extension weight
- Placing attachments tightly against the scalp
- Positioning panels where they cannot be covered
- Applying direct heat to the adhesive attachment
- Ignoring repeated slippage or discomfort
Tape-In Hair Extension Aftercare
- Follow the recommended post-fitting washing guidance for the adhesive system used.
- Wash the hair upright using lukewarm water.
- Avoid aggressively rubbing or twisting extension lengths together.
- Keep oils, masks and heavy conditioners away from the tape attachments.
- Use conditioning products mainly through the mid-lengths and ends.
- Dry the natural-hair root and tape attachment areas thoroughly.
- Never sleep with fitted extensions wet or damp.
- Brush gently from the ends upwards while supporting the root area.
- Avoid concentrated heat directly on the adhesive panels.
- Secure longer hair loosely before sleeping.
- Attend professional maintenance when required.
How Are Tape-In Hair Extensions Removed?
Tape-In removal is covered in its own dedicated guide. A suitable professional Tape-In remover is applied to the adhesive attachment before the panels are carefully separated without pulling or peeling against resistance.
The removal guide also covers adhesive residue, cleaning reusable extension panels and preparing suitable extensions for new replacement tape tabs.
Tape-In Removal GuideShop Tape-In Extensions & Application Tools
Browse our Tape-In Remy human hair extensions together with professional application tools and replacement adhesive tabs.
Shop Tape-In Extensions Tape Application Pliers Replacement Tape TabsRelated Hair Extension Guides
Tape-In Hair Extension Fitting – FAQs
What are Tape-In hair extensions?
Tape-Ins are professionally fitted extension panels that use adhesive attachment areas to secure extension hair around carefully sectioned natural hair.
How are Tape-In extensions fitted?
In a standard sandwich application, an appropriate section of natural hair is positioned between two compatible adhesive extension panels, which are aligned and professionally secured.
Do Tape-In extensions require heat?
Standard Tape-In application uses adhesive panels and does not require a heat-fusion connector.
How much natural hair goes between the tapes?
The section should appropriately support the extension while still allowing the adhesive panels to connect as intended. Too much or too little natural hair can cause fitting problems.
Can Tape-Ins be fitted right against the scalp?
They should be positioned to allow comfortable natural movement rather than sitting tightly against the scalp.
Why are my Tape-In extensions slipping?
Oils, product residue, contaminated adhesive, unsuitable section size, panel alignment, application pressure and maintenance can all contribute.
Can I use conditioner on Tape-In extensions?
Conditioning products can be used appropriately through the mid-lengths and ends, but avoid applying oily or heavy conditioning products directly onto the adhesive attachments.
Can Tape-In extensions be reused?
Suitable extension panels may be professionally cleaned, prepared and retaped if the extension hair remains in good enough condition for reuse.
How are Tape-In extensions removed?
A suitable Tape-In remover is applied to the adhesive attachment before the panels are carefully separated. See our dedicated Tape-In Removal Guide for the full process.
Should Tape-In extensions hurt?
Significant or persistent pulling or discomfort should not simply be accepted as normal. Have uncomfortable attachments professionally checked.
Clean Preparation & Accurate Placement Matter
Successful Tape-In application depends on properly prepared natural hair, clean adhesive surfaces, appropriate section size, accurate panel alignment and comfortable professional placement.
Shop Tape-In Extensions Tape-In Removal Guide All Fitting & Removal Guides