PONYTAILS
£7.99
Dispatch Deadline:
Submit your order in the next:
These Hair Extension Removal Pliers, also known as Bond Cracker Pliers, are designed for professional removal of compatible Nail-Tip / U-Tip and keratin-bonded hair extensions.
The spring-loaded pliers are used to compress and crack the keratin attachment before a compatible bond-removal solution is applied, helping the remover work into the bond during the professional removal process.
The pliers are designed to apply controlled pressure around compatible keratin attachments, helping to crack and break the bond into smaller sections before removal solution is introduced.
Breaking the attachment in several areas can help expose more of the keratin to the remover and assist with the subsequent release of the extension.
A spring-loaded mechanism assists with reopening the handles between uses, making the pliers practical when working through multiple extension bonds during a professional removal service.
Once the compatible keratin bond has been carefully cracked with the removal pliers, apply an appropriate amount of 50ml Acetone Bond Remover to the attachment.
Allow the remover suitable time to work into the keratin before using the pliers again to further break apart the softened bond.
Carefully position the plier jaws around the keratin attachment and compress the bond in several areas. Apply the compatible remover and allow it time to penetrate the attachment.
Reapply the pliers as required to work the softened keratin apart. Once the bond has been sufficiently broken down, carefully release the extension from the natural hair.
Explore our Nail-Tip / U-Tip Hair Extensions, professional acetone bond remover, complete pre-bonded removal kit and step-by-step removal guidance.
Browse our Nail-Tip / U-Tip Hair Extensions for professional pre-bonded application using compatible keratin bonds and fitting equipment.
Browse our 50ml acetone remover designed to help break down compatible keratin bonds during professional Nail-Tip / U-Tip extension removal.
Browse our complete Pre-Bonded Removal Kit containing acetone remover, removal pliers, protective gloves and dropper insert for compatible keratin extensions.
Read our step-by-step guide covering professional removal of Nail-Tip / U-Tip pre-bonded extensions using compatible removal products and tools.
Explore this Removal Plier (Bond Cracker) from the HairXtensions Micro & Nano Ring Tools collection. Designed for suitable professional ring release or removal procedures.
Always check the product's specifications and compatibility before use. Professional training is recommended for semi-permanent hair extensions.
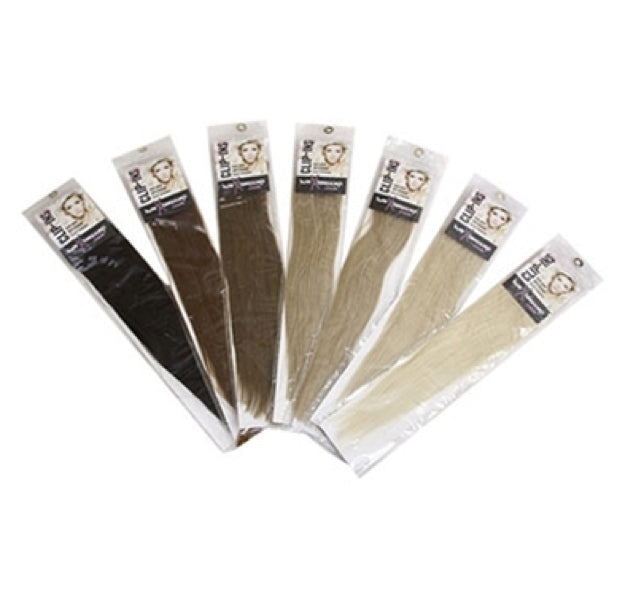
These individual Chinese Remy human hair extensions use a pre-bonded keratin Nail-Tip / U-Tip attachment and are fitted professionally using a fusion heat connector.
At approximately 0.5g per strand, this range provides a lighter individual strand that is useful for flexible placement and blending.
These extensions are supplied in quantities of 25 strands.
As a general guide, approximately 150–200 strands (6–8 bundles) may be used for a full-head application, while around 75–100 strands (3–4 bundles) may be used for a half-head application.
The exact amount required depends on your natural hair thickness, density, existing length and the finished result you want to achieve. We recommend discussing the required quantity with your hairstylist before ordering.
Nail-Tip extensions use a heat-fusion fitting method. The pre-bonded keratin tip is softened using a professional fusion heat connector and secured around an appropriately sized section of natural hair.
View our full Nail-Tip / U-Tip fitting guide.
Nail-Tip extensions should be removed carefully using suitable professional removal products and tools to soften and separate the keratin attachment from the natural hair.
View our full Nail-Tip / U-Tip removal guide.
With suitable aftercare, the extensions can be worn for approximately 2–3 months. They can be washed, curled and straightened, while care should be taken around the keratin attachments.
View our hair extension aftercare advice.
Product: Hair Extension Removal Plier (Bond Cracker)
Tool Type: Professional Keratin Bond Removal Pliers
Design: Spring-Loaded Hand Plier
Primary Function: Cracking and Compressing Hardened Keratin Attachments
Suitable For: Compatible Nail-Tip / U-Tip and Keratin-Bonded Hair Extensions
Application Stage: Professional Hair Extension Removal
Used With: Compatible Keratin Bond Removal Solution
Additional Function: Helps Break Hardened Bonds into Smaller Sections
Not Intended For: Tape-In Adhesive Removal or Micro/Nano Ring Opening
Recommended User: Trained Hair Extension Professionals
Quantity: 1 Removal Plier
1. Identify the fitted hair extension attachment before starting. Confirm the bond type and select a compatible professional removal solution.
2. Prepare a suitable workspace and organise the client's hair into manageable sections.
3. Gently detangle the extension lengths and isolate one keratin-bonded attachment from surrounding natural hair.
4. Position the Bond Cracker Pliers around the hardened keratin attachment, keeping the jaws away from the scalp and skin.
5. Carefully compress the bond in several areas to crack and weaken the hardened keratin.
6. Apply an appropriate compatible keratin bond remover directly to the cracked attachment, following the remover manufacturer's instructions.
7. Allow sufficient time for the solution to penetrate and soften the attachment.
8. Reposition the Bond Cracker Pliers around the softened bond and carefully compress it again to break the material into smaller pieces.
9. When the attachment has sufficiently loosened, gently release the extension from the natural hair using the correct professional removal technique.
10. If the extension remains firmly attached, stop and repeat the appropriate bond-breaking and remover stages. Never pull or force the extension.
11. Carefully clear the remaining keratin fragments and naturally shed hair while supporting the client's natural hair.
12. Repeat section by section, then inspect the natural hair and complete the appropriate after-removal care.
• These pliers are designed for hair extension removal, not application.
• Always identify the keratin bond type before selecting a compatible removal solution.
• Work through small sections so that each attachment can be accessed clearly.
• Keep the jaws centred on the keratin bond rather than the surrounding natural hair.
• Crack the hardened attachment in several places using controlled pressure.
• Avoid excessive squeezing that could damage or trap natural hair.
• Apply the appropriate bond remover after cracking the attachment, following the product instructions.
• Allow sufficient time for the solution to soften the bond before further compression.
• Support the natural hair near the attachment when gently releasing the extension.
• Never pull, twist or force an extension that remains attached.
• For stubborn bonds, repeat the appropriate remover and bond-breaking stages instead of increasing pulling force.
• Carefully remove loosened keratin fragments and accumulated shed hair after the extension has been released.
• Refer to the HairXtensions Nail-Tip / U-Tip Removal Guide for step-by-step professional guidance.
• PROFESSIONAL USE RECOMMENDED. Appropriate training in pre-bonded hair extension removal is important.
• Use only with compatible Nail-Tip / U-Tip and keratin-bonded attachments.
• Take care when positioning the plier jaws close to the scalp, skin and natural hair.
• Avoid excessive compression that could pinch, cut or damage natural hair.
• Do not pull or forcibly remove extensions that remain attached.
• Select the correct bond removal solution for the attachment type. Italian keratin and Chinese keratin systems may require different removers.
• Follow all safety instructions supplied with compatible chemical removal products.
• If using an acetone-based remover, ensure suitable ventilation, appropriate personal protection and separation from flames, heat and ignition sources.
• Do not use damaged pliers, misaligned jaws or a defective spring mechanism.
• Clean the pliers after use according to the tool's material and manufacturer's care instructions.
• Dry thoroughly before storage to help prevent deterioration.
• Store securely away from children and protect the jaws from accidental damage.
• Stop the removal procedure if unexpected resistance, hair breakage or client discomfort occurs.
Explore compatible products and useful accessories.
Please review our returns policy for eligibility and instructions. Your statutory rights are not affected.