


Clip-In hair extensions are one of the easiest ways to change your hairstyle without committing to a permanently fitted extension method. They can be used to add noticeable length, extra volume, thickness or simply give you more hair to work with when creating curls, braids and occasion styles.
Because individual Clip-In wefts can be positioned around different areas of the head, you can also change their placement depending on the hairstyle you want to create.
In this guide, we look at easy ways to style human hair Clip-In extensions, how to position them for different looks, how to keep the clips hidden and how to use heat safely when styling.
Clip-In hair extensions can be worn straight, curled, waved, braided, half-up or incorporated into suitable ponytail and updo styles. For the most natural result, position the wefts where they will remain covered by your own hair, blend the natural hair with the extensions and use heated styling tools carefully with suitable heat protection.
Start With Correct Clip-In Placement
A good hairstyle starts with good placement. Even beautifully styled extension hair can look unnatural if the clips are visible.
Begin at the lower back of the head and work upwards, using the wider wefts through the back and smaller pieces around the sides where required.
Leave enough natural hair around the crown, hairline and sides to cover the clips completely.
Important: Avoid placing Clip-In wefts too close to the parting or hairline. These areas generally have less natural hair available to conceal the attachment.
1. Wear Your Clip-Ins Straight
Straight hair is one of the simplest ways to wear Clip-In extensions and can work particularly well when your natural hair already has a similar texture.
Once the extensions are fitted, gently brush your natural hair and the extension hair together so that the two blend more naturally.
If straightening is required, use a suitable heat-protection product and a controlled temperature.
Keep straighteners away from the metal clips and stitched top of each extension weft. Heated tools should be used on the hair lengths rather than directly against the attachment area.
2. Create Soft Waves
Soft waves are a useful style when you want the natural hair and extension hair to blend together.
Once your Clip-Ins are positioned, divide the hair into manageable sections and create loose waves through both your natural hair and extension lengths.
Styling the natural and extension hair in a similar direction can help prevent a visible separation between the two.
For a softer finish, allow each section to cool before gently separating the waves with your fingers or a suitable brush.
3. Add Curls with Clip-In Extensions
Human hair Clip-In extensions can be curled to create more defined volume and movement.
Use a suitable heat-protection product before styling and avoid using unnecessarily high temperatures.
Work through small sections rather than trying to curl large amounts of hair at once. Allowing each curl to cool before brushing or separating it can also help the finished shape set more effectively.
Hair Extension Heat Styling Guide4. Half-Up, Half-Down Hair
A half-up hairstyle can work particularly well with Clip-Ins because you can concentrate the extension pieces through the lower and middle sections of the hair while leaving the upper natural hair free for styling.
Fit the wider wefts through the back of the head and make sure your chosen half-up section leaves enough natural hair to cover the highest extension row.
The upper section can then be tied, clipped or twisted while the extension lengths remain loose underneath.
Before securing the top section, check the back and sides in a mirror to make sure none of the Clip-In attachments have become exposed.
5. Create a Side Braid
Extra length and thickness can make Clip-In extensions useful for creating fuller-looking braids.
Fit the wefts through the back and sides, then gently bring the natural and extension hair together towards your preferred side.
Once the braid is complete, you can gently loosen individual sections to create a softer and fuller-looking finish.
Avoid pulling aggressively while braiding, particularly around areas where the extension clips are attached.
6. Create a Full Braid
Clip-In extensions can also add more hair to a traditional three-strand, French-style or other suitable braid.
Position the extensions so the clips will remain hidden once the hair is directed into the braid.
If some wefts become visible during the styling process, remove and reposition them rather than trying to cover exposed clips with excessive hairspray or pins.
7. Create a Low Ponytail
A low ponytail can be created with Clip-In extensions, but placement needs a little more thought because moving the hair backwards can expose the clips.
Use fewer extension pieces if necessary and position them where your natural hair can still comfortably cover the attachments once the hair is gathered.
After securing the ponytail, check around the sides and back for exposed clips before completing the style.
If you mainly want a long, full ponytail rather than loose extension hair, a dedicated wrap-around Ponytail extension may be easier to apply and remove.
8. Create a Low Bun or Updo
Clip-Ins can provide extra volume for suitable buns and lower updos, particularly where the additional hair can be incorporated without exposing the attachment clips.
Start with fewer wefts than you would normally use for wearing the extensions loose. This can make the hair easier to gather while reducing bulk around the attachment areas.
Position the pieces lower on the head and check visibility as you build the style.
9. Use Clip-Ins for Volume Rather Than Length
Clip-In extensions do not have to create dramatically longer hair.
If your main goal is additional thickness, the extensions can be trimmed or blended appropriately so they sit closer to your natural length.
You can also use fewer pieces from the set when you only want to add fullness through selected areas.
Using only the extension pieces you actually need can create a lighter, more natural result than automatically fitting every weft for every hairstyle.
10. Add Volume Around the Sides
Smaller Clip-In pieces can be positioned around the sides of the head when additional fullness is required around the face.
Make sure there is enough natural hair above and around each piece to hide the clip.
Avoid placing extensions immediately next to the hairline, where the clip may become visible as the natural hair moves.
How to Blend Clip-In Extensions with Your Natural Hair
Blending is one of the most important parts of creating a believable Clip-In hairstyle.
Choose the Right Colour
A close colour match helps reduce the visual separation between your natural hair and the extension lengths.
Position Wefts Carefully
Spread the pieces through the back and sides rather than concentrating every weft in one small area.
Style Together
Curling or waving your natural hair and extensions together can help create a more consistent texture.
Consider the Length Difference
Very short natural hair combined with much longer extensions may require additional blending or professional trimming.
How to Hide Clip-In Extension Clips
Visible clips are one of the most common reasons a Clip-In hairstyle can look less natural.
- Leave enough natural hair above every extension row.
- Avoid fitting pieces directly beside your parting.
- Keep clips away from the front hairline.
- Use smaller pieces around the sides where appropriate.
- Check the back of your head using a second mirror.
- Reposition any weft that becomes visible when creating an updo.
If your natural hair is particularly fine, the placement of the highest extension row becomes especially important because there may be less hair available to conceal it.
Styling Clip-Ins with Shorter Natural Hair
Clip-In extensions can still be used with shorter natural hair, but blending may require more attention.
A very noticeable difference between the natural hair length and extension length can leave a visible line where the shorter hair finishes.
Waves and curls can sometimes help soften this difference because the two lengths move together rather than falling in completely straight layers.
Professional cutting or blending may also be considered where appropriate, but remember that cutting extension hair is permanent.
Can You Cut Clip-In Hair Extensions?
Human hair Clip-In extensions can be cut where required, particularly when blending the extension length into your existing hairstyle.
However, once extension hair has been cut it cannot be returned to its original length.
If you are unsure how much should be removed, consider asking an experienced hairdresser to blend the extensions while they are fitted in their normal position.
Can You Heat Style Clip-In Hair Extensions?
Human hair Clip-In extensions can be styled with heated tools, but they should still be treated carefully.
- Apply a suitable heat-protection product first.
- Use the lowest effective temperature for your hairstyle.
- Avoid repeatedly passing heated tools over the same section.
- Keep straighteners and curling tools away from the clips.
- Avoid direct heat on the stitched top of the extension wefts.
- Allow the extensions regular breaks from heated styling.
Excessive heat can contribute to dryness and shorten the usable life of extension hair. More heat does not automatically create a better style.
Style Your Clip-Ins Before Fitting Them
One advantage of removable Clip-In extensions is that some styling can be completed while the pieces are out of your hair.
For example, individual wefts can be carefully curled before fitting, provided the extension is held securely and heated tools are kept away from the clips and stitching.
This can sometimes make it easier to control the extension hair and reduce the need to work close to your scalp with heated tools.
Make Sure Your Colour Matches Before Styling
Styling can help natural hair and extensions blend, but it cannot fully compensate for a significantly incorrect colour match.
Compare the Clip-In shade with the lengths of your natural hair before opening the product beyond what is permitted under the returns policy.
Natural hair can contain several different tones, so consider the overall colour through the lengths rather than matching only your roots.
Hair Extension Colour Chart Colour Match GuaranteeAvoid Colouring Clip-In Extensions to Match
HairXtensions does not recommend colouring, bleaching or toning extension hair after purchase.
We also advise against using silver or purple shampoo to try to alter the colour of blonde extension hair.
The extension hair has already been processed to achieve its finished shade, and further chemical processing can affect condition and lifespan.
Choosing the closest available shade before opening and styling the extensions is the safer approach.
Remove Clip-Ins After Wearing Your Style
Clip-In extensions are a removable method and should be taken out before sleeping.
Once you have finished wearing your hairstyle, open each clip individually before gently releasing the extension from your natural hair.
Never pull an extension weft away while the clips remain closed.
Gently brush the extensions from the ends upwards before storing them neatly for your next use.
Complete Clip-In Aftercare GuideEasy Clip-In Hairstyle Ideas at a Glance
Straight & Sleek
Blend the natural hair and extensions into one smooth, straight style.
Soft Waves
Create loose movement through both the natural and extension hair.
Defined Curls
Add more shape and volume using controlled heat and suitable protection.
Half-Up Style
Keep the extensions through the lower sections while styling your natural upper hair.
Side Braid
Use the added length and volume to create a fuller-looking braid.
Low Ponytail
Position fewer wefts carefully so the clips remain hidden when the hair is gathered.
Low Bun
Additional hair can create more volume for suitable lower updos.
Volume Only
Use selected wefts to add thickness without dramatically increasing your natural length.
About HairXtensions Clip-In Hair Extensions
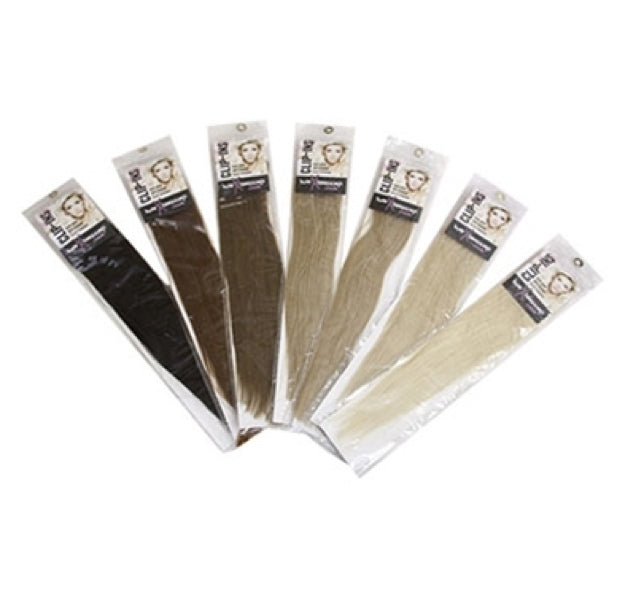
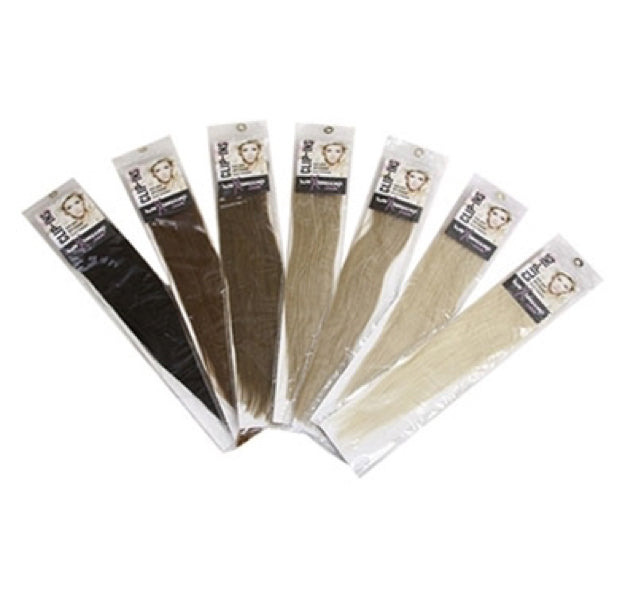
HairXtensions Clip-In sets are made using human Remy-graded hair and are supplied as seven separate pieces with clips already attached.
Current sets are available in 14", 18", 20" and 22" lengths, with set weights ranging from approximately 80g to 115g depending on the selected length.
The removable fitting makes Clip-Ins suitable for temporary length, volume and styling without committing to a permanently fitted extension method.
Shop Clip-In Hair Extensions Clip-In Fitting GuideStyling Clip-In Hair Extensions – FAQs
Can you style Clip-In hair extensions?
Yes. Human hair Clip-In extensions can be worn straight, waved, curled, braided or incorporated into suitable ponytail and updo styles. Placement should be adjusted so the clips remain concealed.
Can you curl Clip-In hair extensions?
Yes. Use a suitable heat-protection product, controlled temperatures and keep the curling tool away from the clips and stitched attachment area.
Can you straighten Clip-In extensions?
Human hair Clip-Ins can be straightened. Use the lowest effective heat, apply appropriate thermal protection and do not place straighteners directly against the clips or stitching.
How do I hide Clip-In extensions?
Position the extension rows away from the parting and front hairline and leave enough natural hair above each weft to cover the clips completely.
Can I wear Clip-In extensions in a ponytail?
Suitable low ponytail styles can be created with Clip-Ins, although the extension placement may need to be changed so that the clips remain hidden. For a dedicated high or full ponytail look, a removable wrap-around Ponytail extension may be easier.
Can I braid Clip-In extensions?
Yes. Clip-Ins can provide extra length and volume for braids. Make sure the clips are securely positioned and avoid pulling excessively against the attachment areas while braiding.
Can I use Clip-In extensions just for volume?
Yes. You do not have to use every piece or create significantly longer hair. Selected wefts can be used to add fullness through particular areas.
How do I blend Clip-Ins with short hair?
Careful placement, choosing an appropriate length and styling the natural and extension hair into a similar texture can improve blending. Waves and curls can sometimes soften a noticeable difference between shorter natural hair and longer extensions.
Can I cut Clip-In hair extensions?
Human hair extensions can be cut where required for blending, but cutting is permanent. If you are unsure, consider having them professionally blended while fitted in their normal position.
Can I dye Clip-In extensions?
HairXtensions does not recommend dyeing, bleaching or toning extension hair, or using silver/purple shampoo to change the shade. Choose the closest suitable colour before opening and wearing the set.
Should I sleep in styled Clip-In extensions?
No. Clip-In extensions should be removed before sleeping regardless of how they have been styled. Open each clip and remove the pieces gently before brushing and storing them.
More Hair, More Styling Possibilities
Whether you want soft waves, curls, braids, added thickness or an occasional updo, Clip-In extensions give you the flexibility to change your hairstyle whenever you want. Position the pieces carefully, keep the clips hidden and treat human extension hair gently when brushing and heat styling.
Shop Clip-In Hair Extensions Clip-In Aftercare Guide